Demand Manager
Setting Up Demand Manager with Google Ad Manager (GAM) and Google Cloud Console
To start using the Demand Manager, the user needs to set up accounts in Google Ad Manager (GAM) and Google Cloud Console. Follow these simple steps to get everything connected.
Step 1: Enable API Access
Login in your Google Ad Manager (GAM) account.
Navigate to Admin > Global Settings.
Under Global Settings, find the API Access option and make sure it is enabled.
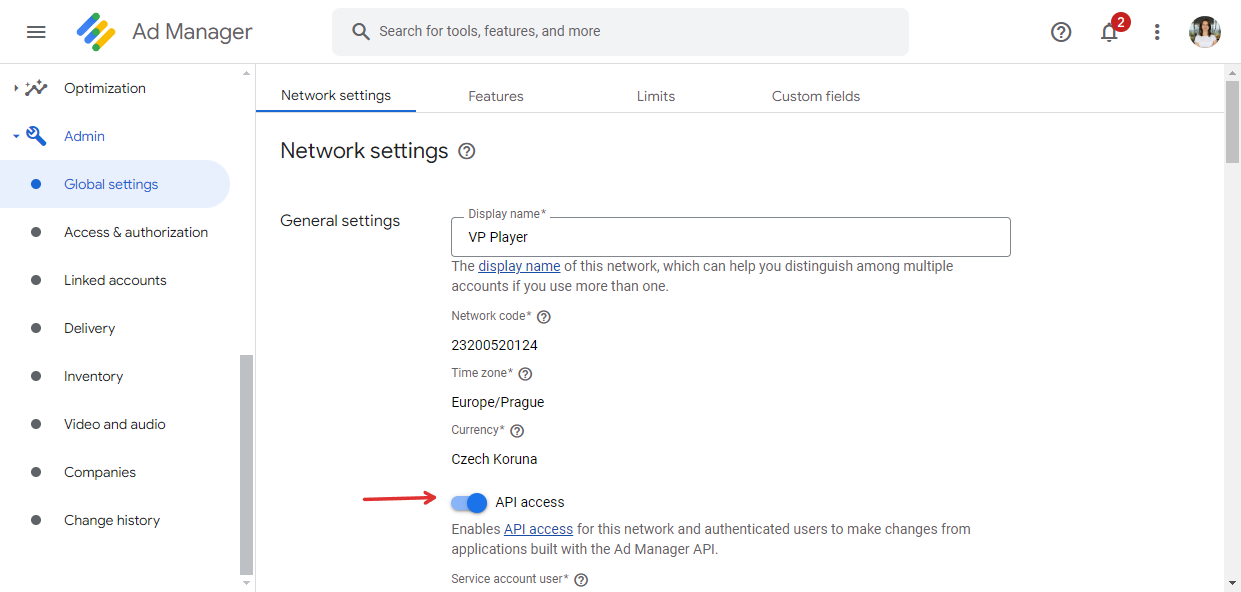
Step 2: Create the JSON Credentials File in Google Cloud Console
To use the Demand Manager feature to boost your yields, the user needs to upload a JSON credentials file to VP Player. This file is created in Google Cloud Console and enables the platform to interact with Google Ad Manager (GAM).
To Create the JSON File in Google Cloud Console follow the steps below
- Go to Google Cloud Console - https://console.cloud.google.com
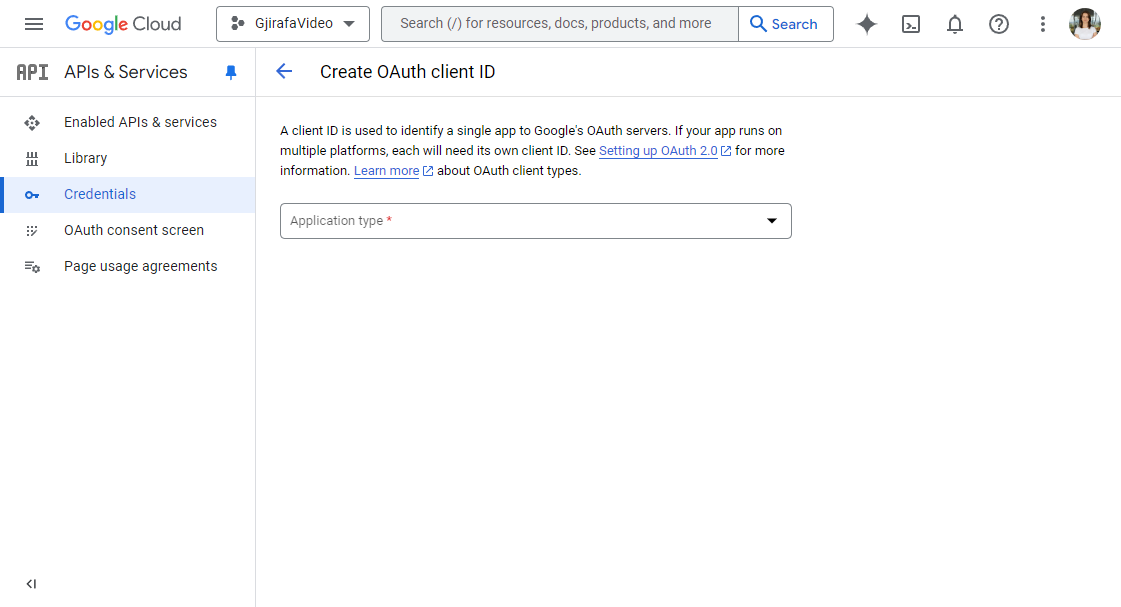
Open the Navigation Menu:
Click the menu in the top left corner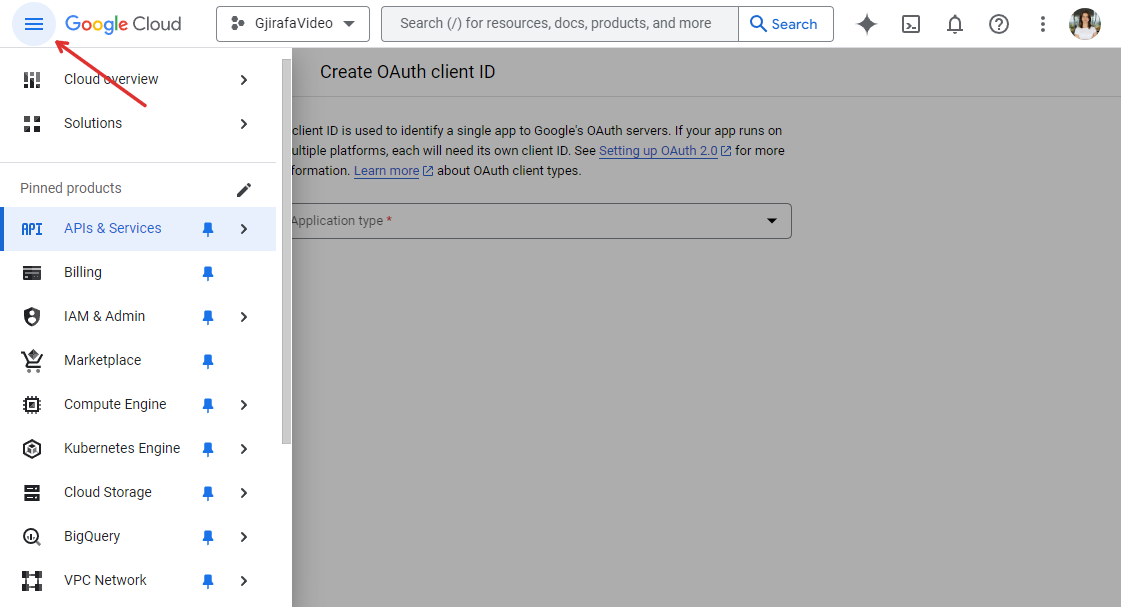
Go to API & Services:
In the menu, click on API & Services.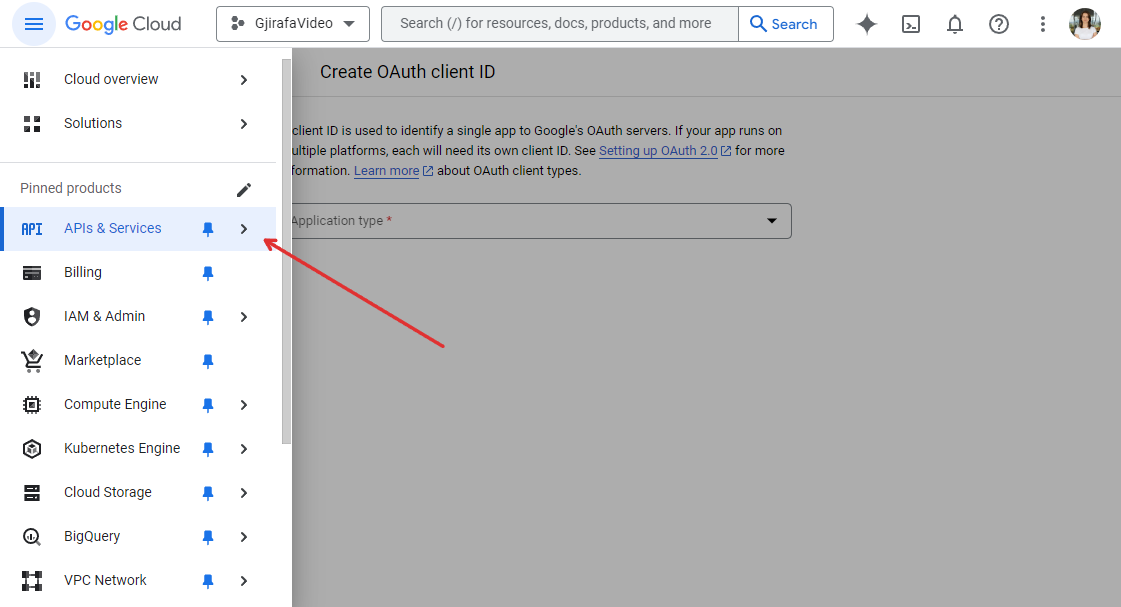
Click on Create Credentials
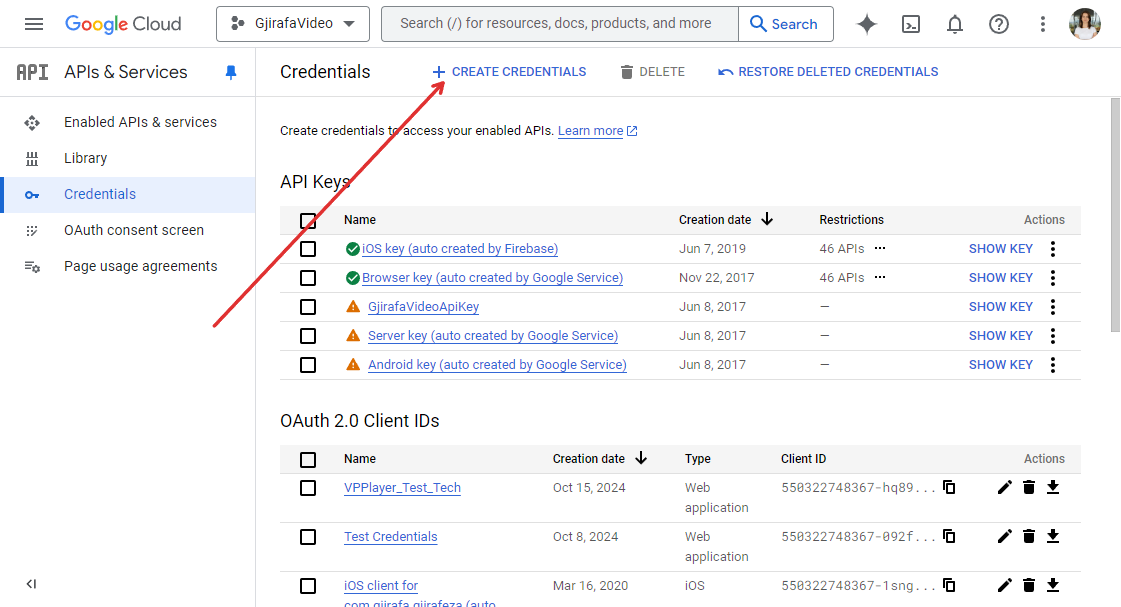
Create OAuth Credentials:
There are three options.
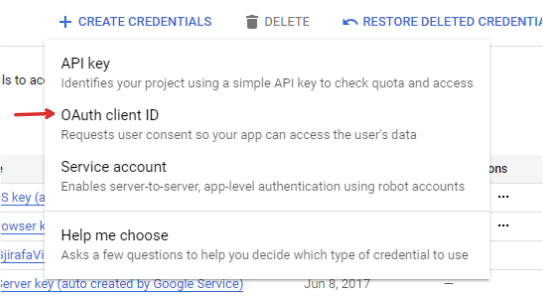
Select OAuth Client ID.
Set the Application type to Web Application.
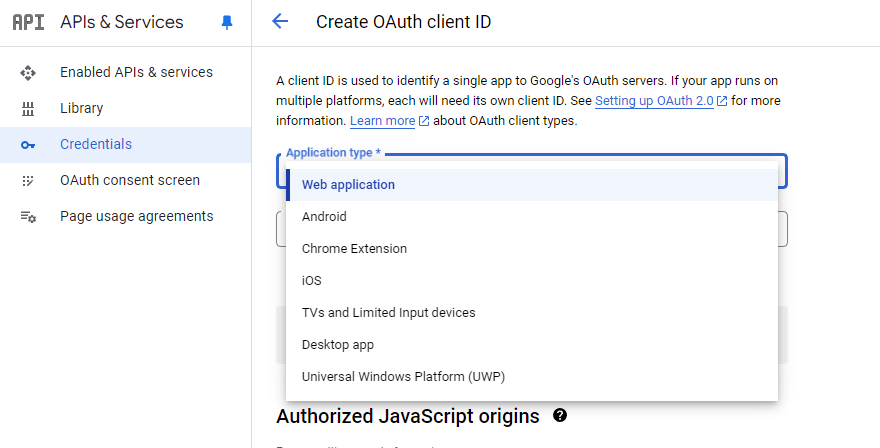
Name your OAuth client (e.g., "VP Player Credentials").
For the Authorized redirect URL, add this link:
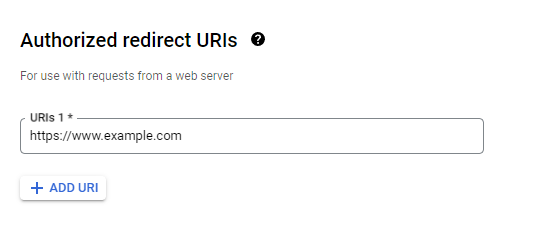
Download the JSON File
- After creating the credentials, on the Credentials Page, you will see an option to Download the OAuth Client ID JSON file.

- Click Download to save the file to your computer.
- After creating the credentials, on the Credentials Page, you will see an option to Download the OAuth Client ID JSON file.
Step 3: Upload the JSON File to VP Player
Once the user downloads the JSON file from Google Cloud Console, follow these steps to upload it to VP Player and complete the integration:
- Log in to VP Player:
- Go to Project Settings:
- Navigate to Project Settings.
- Find GAM Integration:
Within Project Settings, locate the GAM Integration section. - Upload the JSON File:
Click the option to Upload JSON File and select the file you downloaded from Google Cloud Console.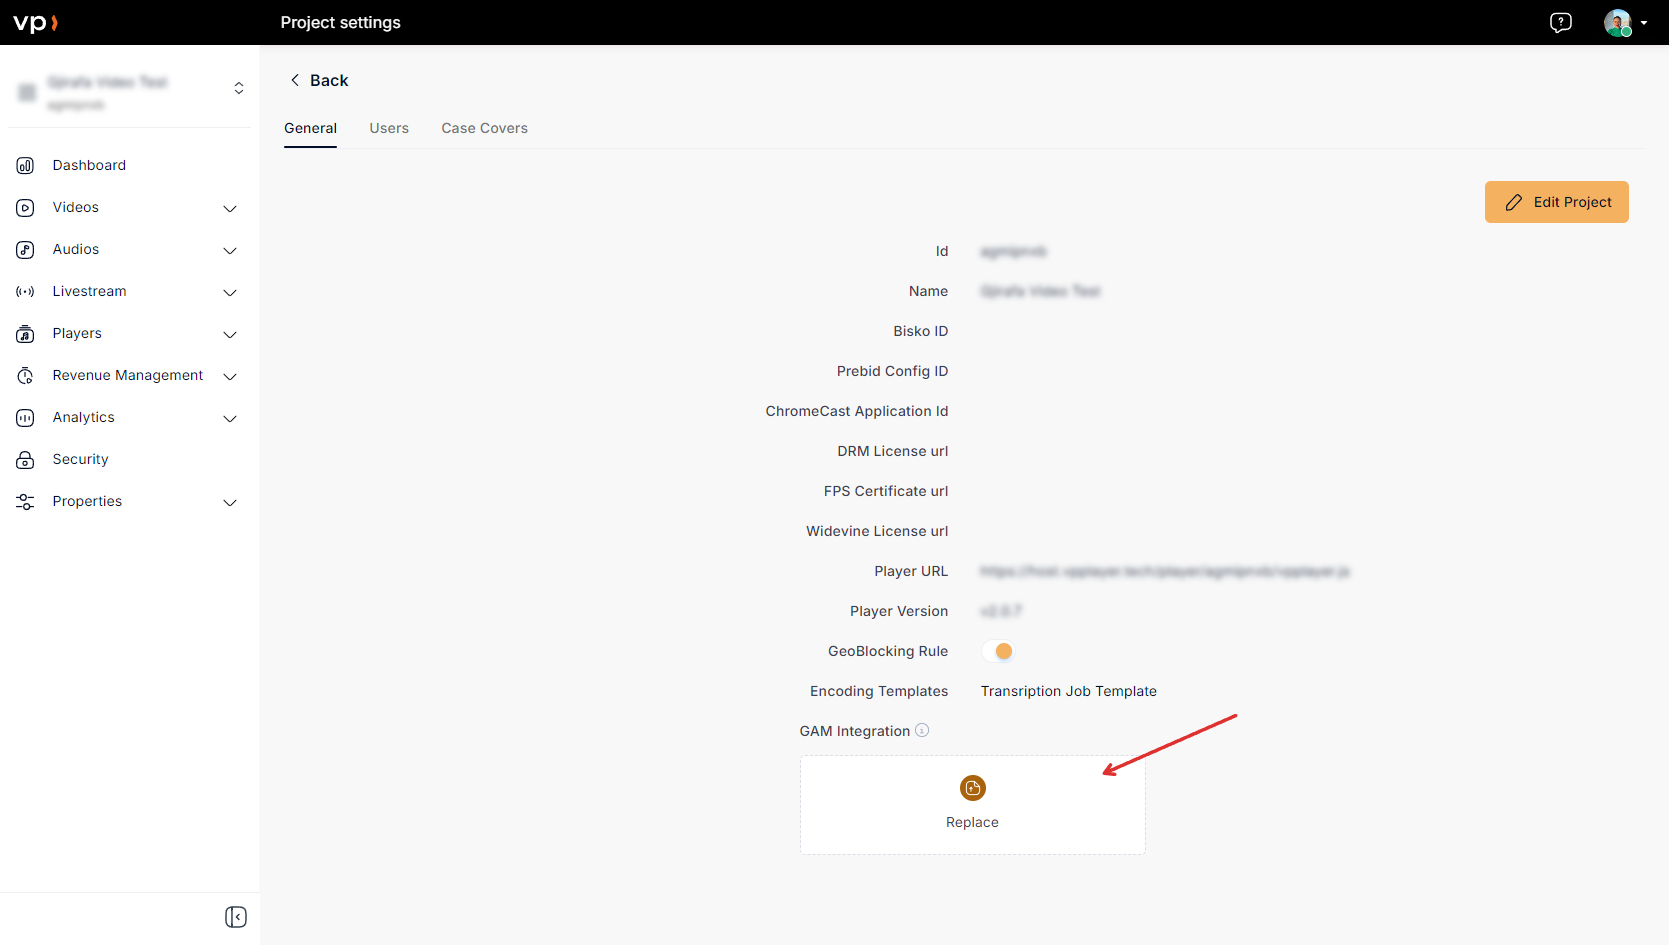
- Authorize Access:
Google will prompt you to confirm whether you want to allow the platform access to your Google Ad Manager account.- To complete the integration, click Allow.
Step 4: Create the wrappers
To create a wrapper, follow these steps.
- Go to Revenue Management:
In the dashboard, go to the Revenue Management section. - Access the Wrappers Section:
Within Revenue Management, find the new subsection named Wrappers. - Create a New Wrapper:
Click on Create Wrapper to set up a new ad wrapper. Fill out the following inputs:
Wrapper Information
- Wrapper Name:
- Name the wrapper
- Wrapper Description:
- Describe the wrapper's use case
- Prebid.js Bidder Timeout (ms):
- Set the maximum amount of time (in milliseconds) that bidders have to respond during the auction process.
- Prebid.js Server Timeout (ms):
- Define the timeout (in milliseconds) for server-side auction responses. This sets the time allowed for server-side bidders to respond before the auction closes. Set a balance between time and bid competition.
- COPPA Inventory:
- Enable this option if your wrapper serves ads for users under 13, ensuring compliance with the Child Online Privacy Protection Act.
Ad Unit Pattern Information
In this section, the user can specify the ad unit pattern to define how bidding rules apply to your ad units.
- Ad Server Currency:
- Select the currency that aligns with your ad server’s bidding system. This ensures all bids are processed in the same currency.
- Bid Option:
- Send All Bids:
- Select this option to send all bids to the ad server.
- Send Top Price:
- Choose this option to send only the highest bid to the ad server
- Send All Bids:
- Price Granularity:
- Price Increment:
- Define the minimum step by which bids can increase, controlling the increment by which bids are raised in each round.
- Price Cap:
- Set the maximum bid allowed for ad impressions to ensure that no bids exceed the specified value.
- Price Increment:
Bidders Information
- Select Bidder:
- Select the specific bidder that will interact with your ad server. Currently, VP supports ad servers such as: Appnexus, Pubmatic, Rubicon, AdForm, AdSpirit, Gjirafa’s ad server and MallTV’s ad server.
- Bidder Status (On/Off):
- Use this toggle to activate or deactivate the bidder.
- Ad Server-Specific Inputs (e.g., Property ID, Placement ID):
- Based on the selected server, the necessary input fields, such as Property ID or Placement ID, must be provided to ensure proper communication between the bidder and the ad server.
- CPM Adjustment (On/Off):
- Adjust the Cost Per Mille (CPM) for each bidder if needed, giving you more control over how bids are evaluated.
Multiple bidders can be added. To add a new bidder, click on the "Add New Bidder" option.
Step 5: Enable Demand Manager for VAST Ads
The final step is to navigate to the “Advertising” edit page of a VAST ad and enable the Demand Manager option.
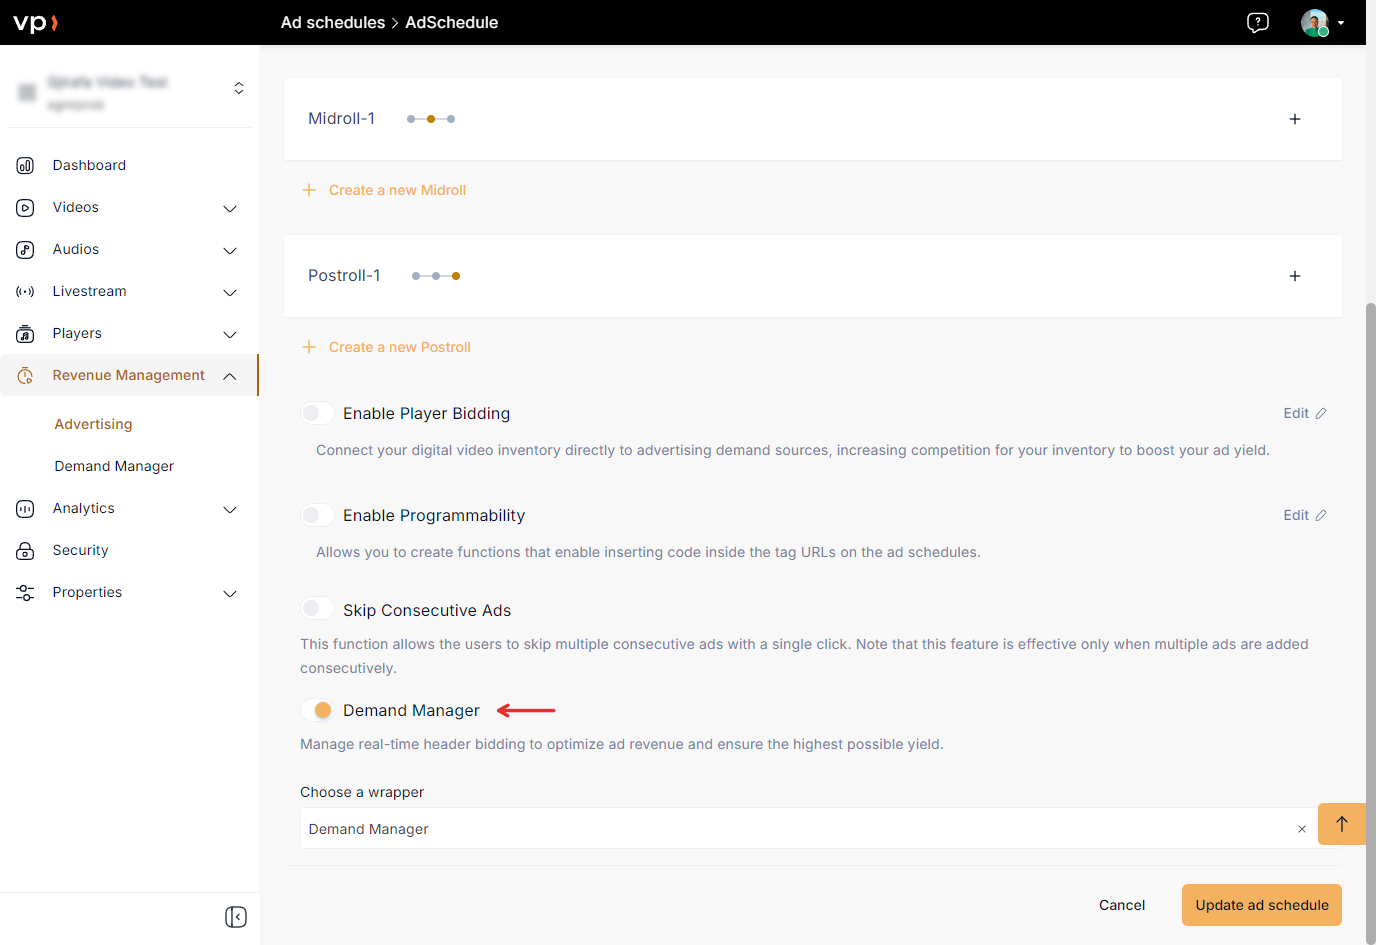
The next step is to ensure that the VAST ads are added to the player or video advertising. The player must have the advertising option enabled for proper integration and delivery of the ads.