Live Videos
This guide will provide you with detailed instructions on creating, customizing, embedding, and managing your live video content.
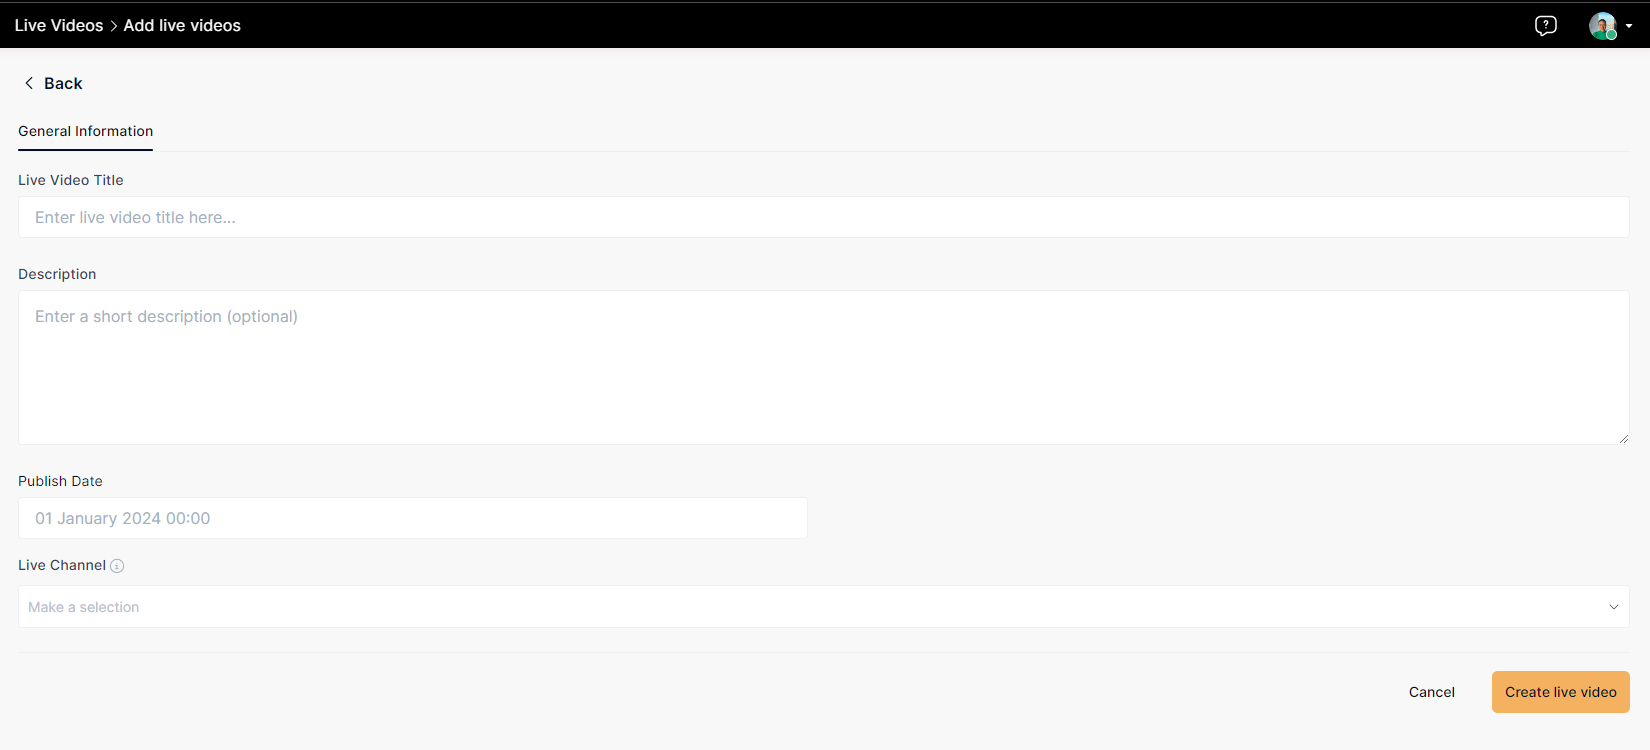
1. Create Live Videos
Overview of Live Videos: Live Videos are customizable streams linked to specific channels. These videos can be embedded, customized with screens, and saved as snippets or recordings.
Connecting Live Videos to Channels: When creating a Live Video, specify its name, description, and the live channel to which it should be connected.
2. Go Live
Initiating Live Videos
- Live Videos can only go live when the associated channel status is Processing.
- Clicking "Go Live" initiates the live stream, enabling features like "Stop Live" and "Cut & Publish."
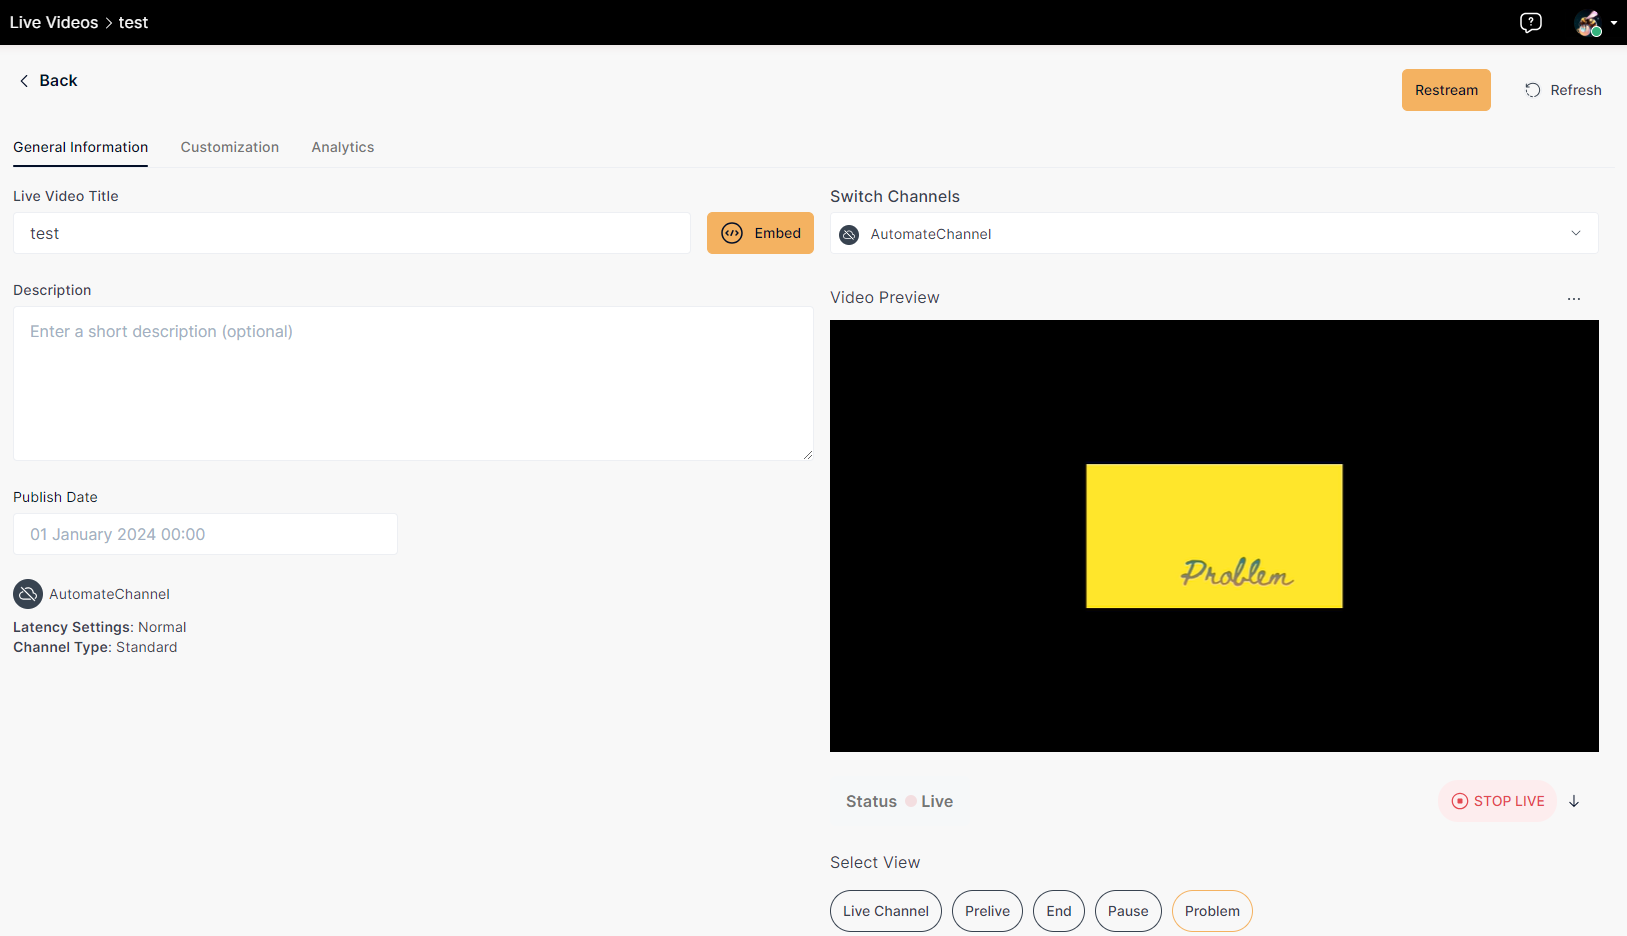
3. Live Video Details
Accessing Live Video Details
- Click on a live video to access details.
- Edit general information, customize screens, and monitor the live stream.
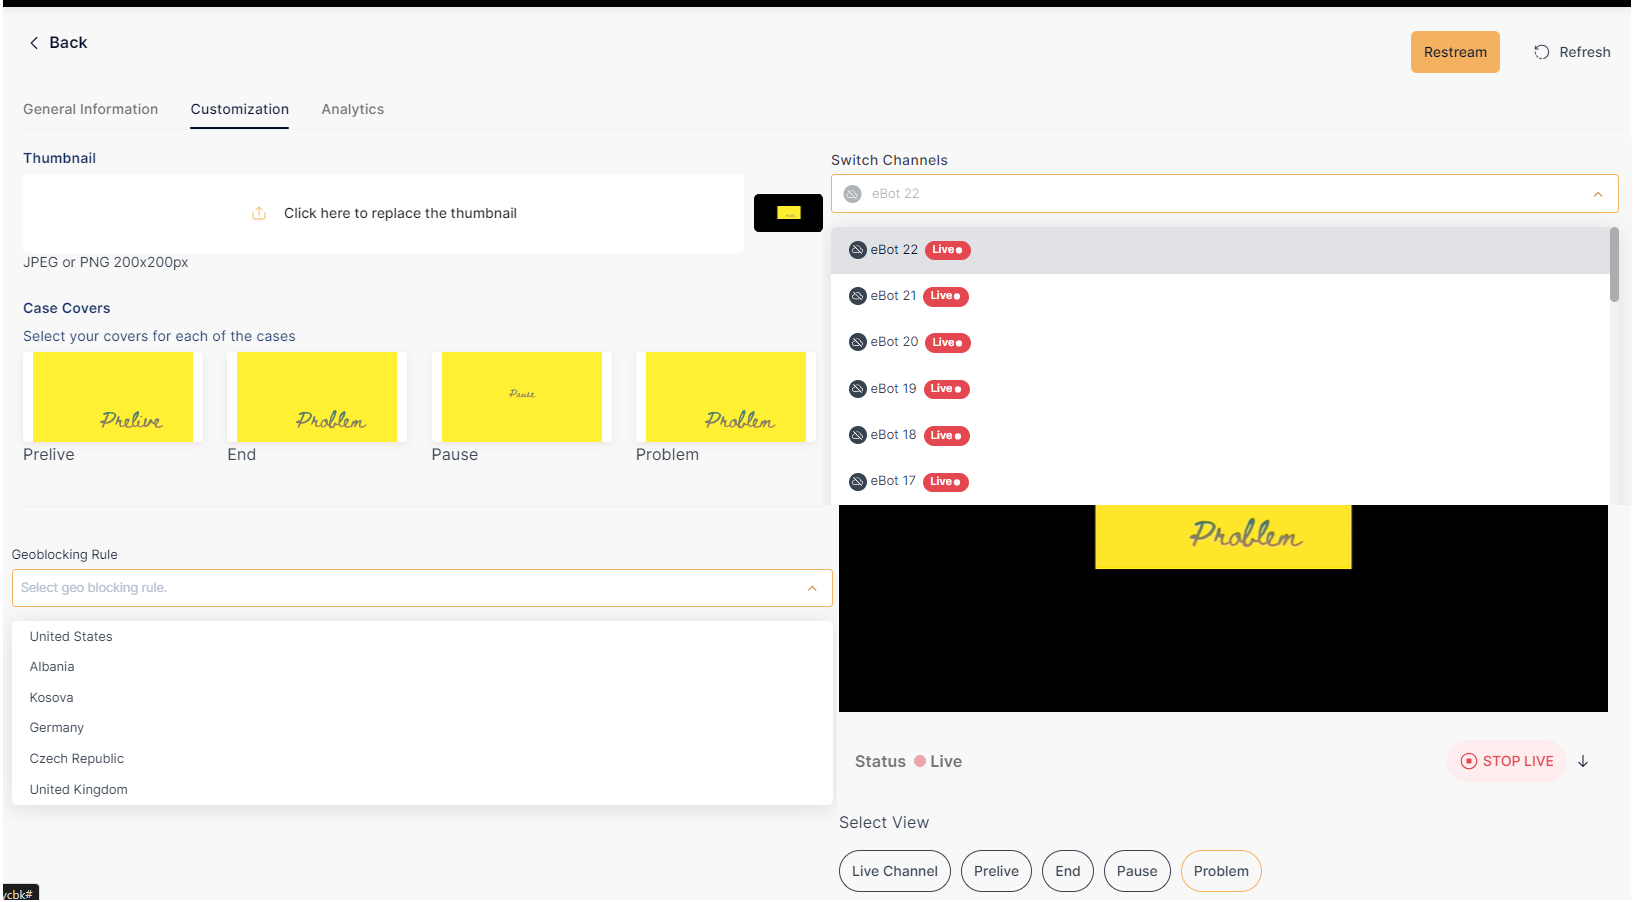
Customizing Live Video Screens
- Add a thumbnail to the live video.
- Choose custom screens for different scenarios, including Live, Prelive, End, Pause, and Problem cases:
- For example, the Prelive screen is shown before the live video starts.
- The Problem screen is automatically updated if there is an issue with the livestream, but it can also be added manually.tip
For more information about Case Covers, visit Case Cover Page
Switching Channels
- More than one channel can be processed simultaneously, and the live video input can be switched to another channel.
- For instance, during a festival with four cameras capturing different views, the admin can switch to a different channel to broadcast a more interesting view for the end users.
Geo-blocking Rules
In the VP Player, the user can create geo-blocking rules and apply them to live videos just as they are used for VODs. These rules allow you to manage content access based on viewer locations.
If you want to learn more about Geoblocking, including how to Manage, Create, or Use, visit "GeoBlockig Rules" Page
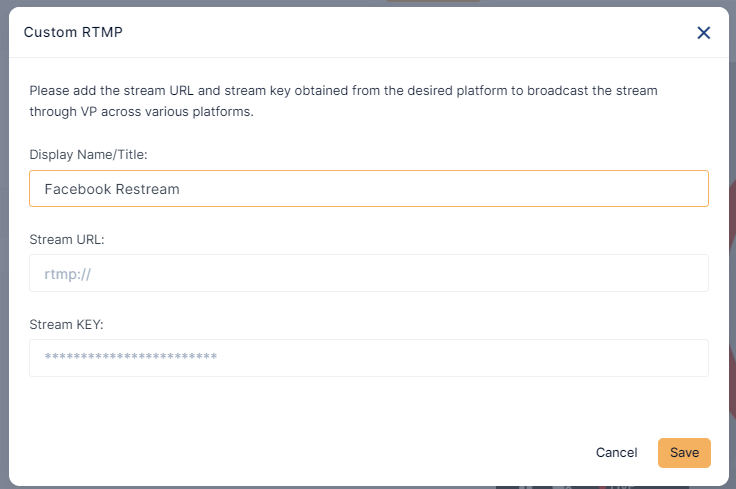
4. Re-stream
- The user can re-stream the live video to other platforms such as Facebook, YouTube, etc.
- To do this, the user connects the live video with the stream URL and stream key of the desired platform.
- When the user stops the live stream in the VP Player, the livestream will also stop on the other platform.
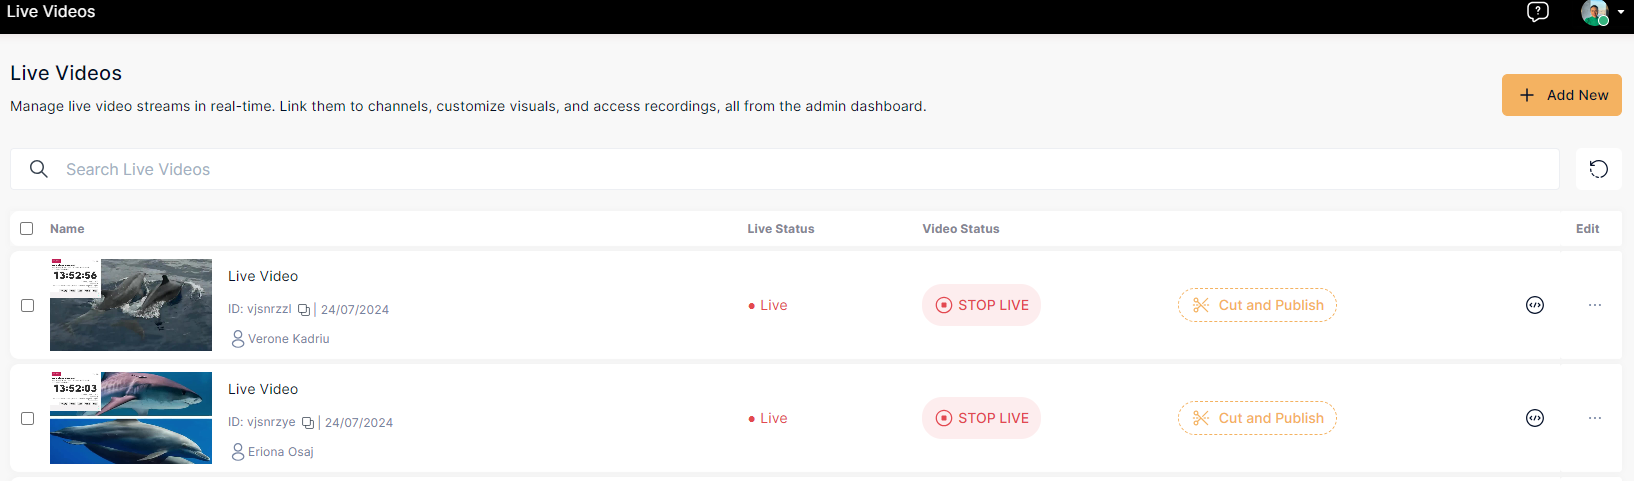
5. Cut and Publish Feature
Accessing the Cut and Publish Option
- Navigate to the Live Videos listing page.
- Locate the "Cut and Publish" button. Alternatively, access the specific live video and click "Cut and Publish" under the video preview.
Setting Cut Points
- After clicking "Cut and Publish," a modal will appear.
- Use the scrubber or the input boxes to select the portion of the video you want to publish.
- Drag the scrubber handles to define the start and end times of the cut portion, or enter the starting and ending durations in the input boxes.
- The minimum duration for the cut portion is 10 seconds; it cannot be lower than this.
- If any white vertical lines appear in the seek bar, they indicate the times when the live video was interrupted.
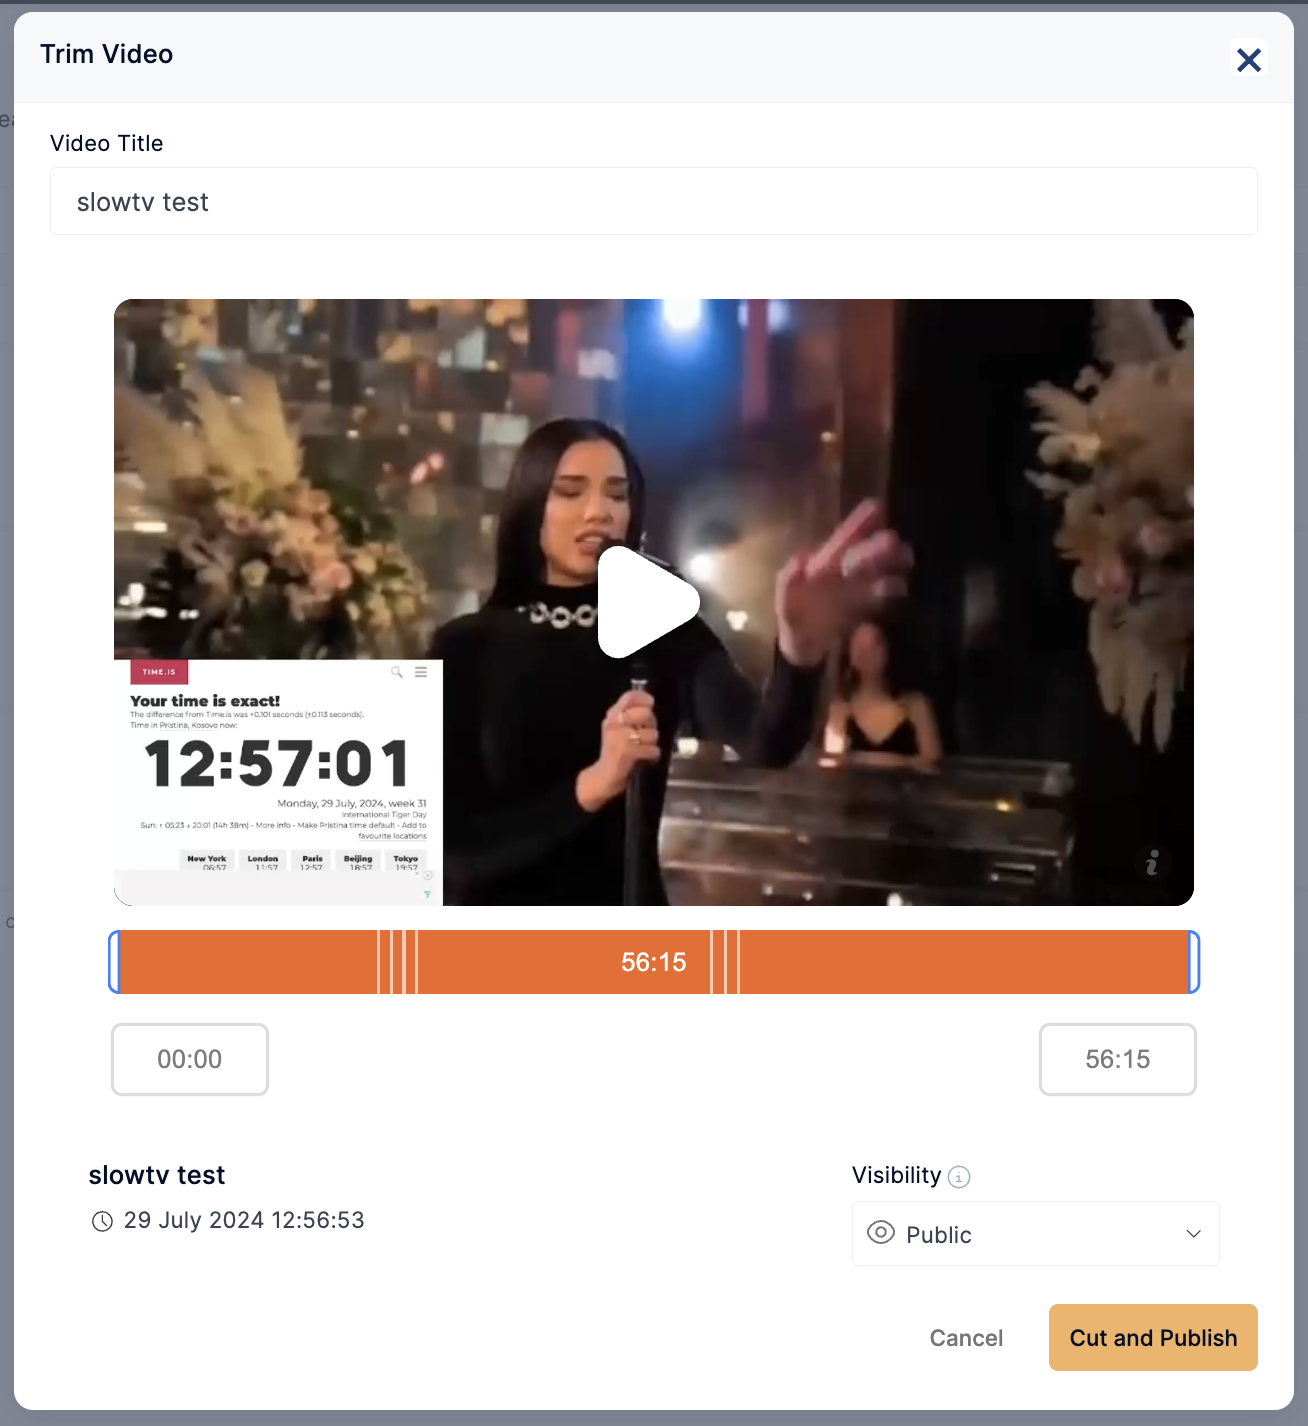
Encoding and Saving as VOD
- Click "Cut and Publish" after setting the desired duration.
- The video will start encoding and be saved as a VOD with the specified duration and a new video ID.
- The cut portion of the video will be available on the Videos listing page.
- The video will be instantly playable and ready for end users to view.
Managing Live Videos: Start, Stop, Cut & Publish
- You can start, stop, or cut the live video anytime during streaming.
- Stop and Cut: Allows you to stop the stream and cut a portion as VOD for publishing.
- Stop Without Saving: Instantly stops the stream without saving the content.
- Stop: Stops the stream and saves the entire session as a VOD.
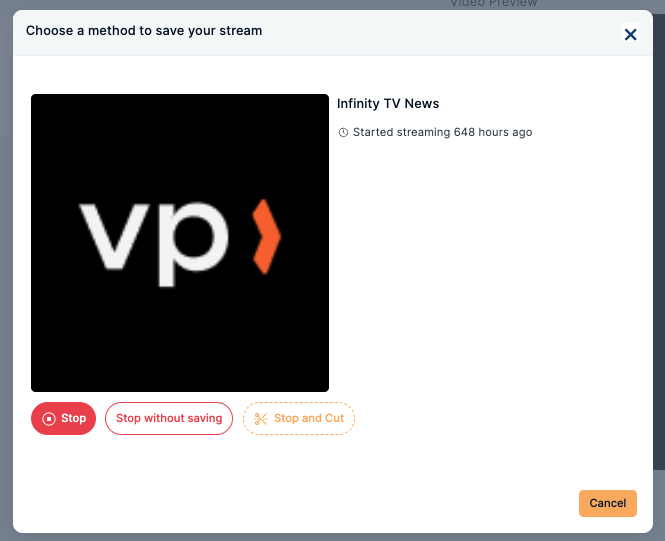
6. Stopping Live Videos
Stop and Cut Option:
- Go to the Live Videos listing page or access the live video directly.
- Click "Stop Live."
- In the modal, select "Stop and Cut."
- Choose the portion you want to publish using the same process as Cut and Publish.
- Click "Stop and Cut" to save the cut portion on the Videos page.
- The video is saved with the live video ID.
Stop Without Saving Option:
- Click "Stop Live."
- In the modal, select "Stop Without Saving."
- The live stream will stop instantly, and it will not be saved for future viewing.
Stop Option:
- Click "Stop Live."
- In the modal, select "Stop."
- The live stream will stop instantly, and the entire session will be saved as a VOD on the Videos listing page.
- The video is saved with the live video ID.
7. Embedding Live Videos
Generating Embed Codes:
- Access your live video.
- Click on the "Embed" button in the General Information tab.
- Choose a player, generate the embed code, and add it to your website.
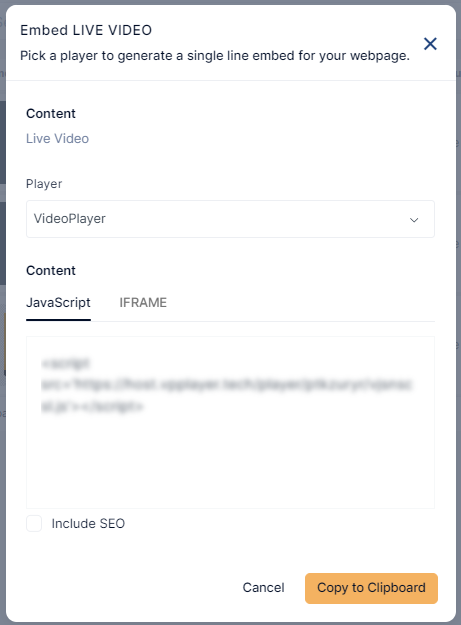
Embedding Live Videos on Websites:
- Paste the generated embed code into your web page to display the live video feed.