Create a Player
Let's suppose now we need a player to watch sporting events. Follow the steps below on how to create one, we will name it "Sports Video Player"
After successfully reaching the Player page, the page where all the existing players are listed, you can follow the steps below to create a fully customizable video player.
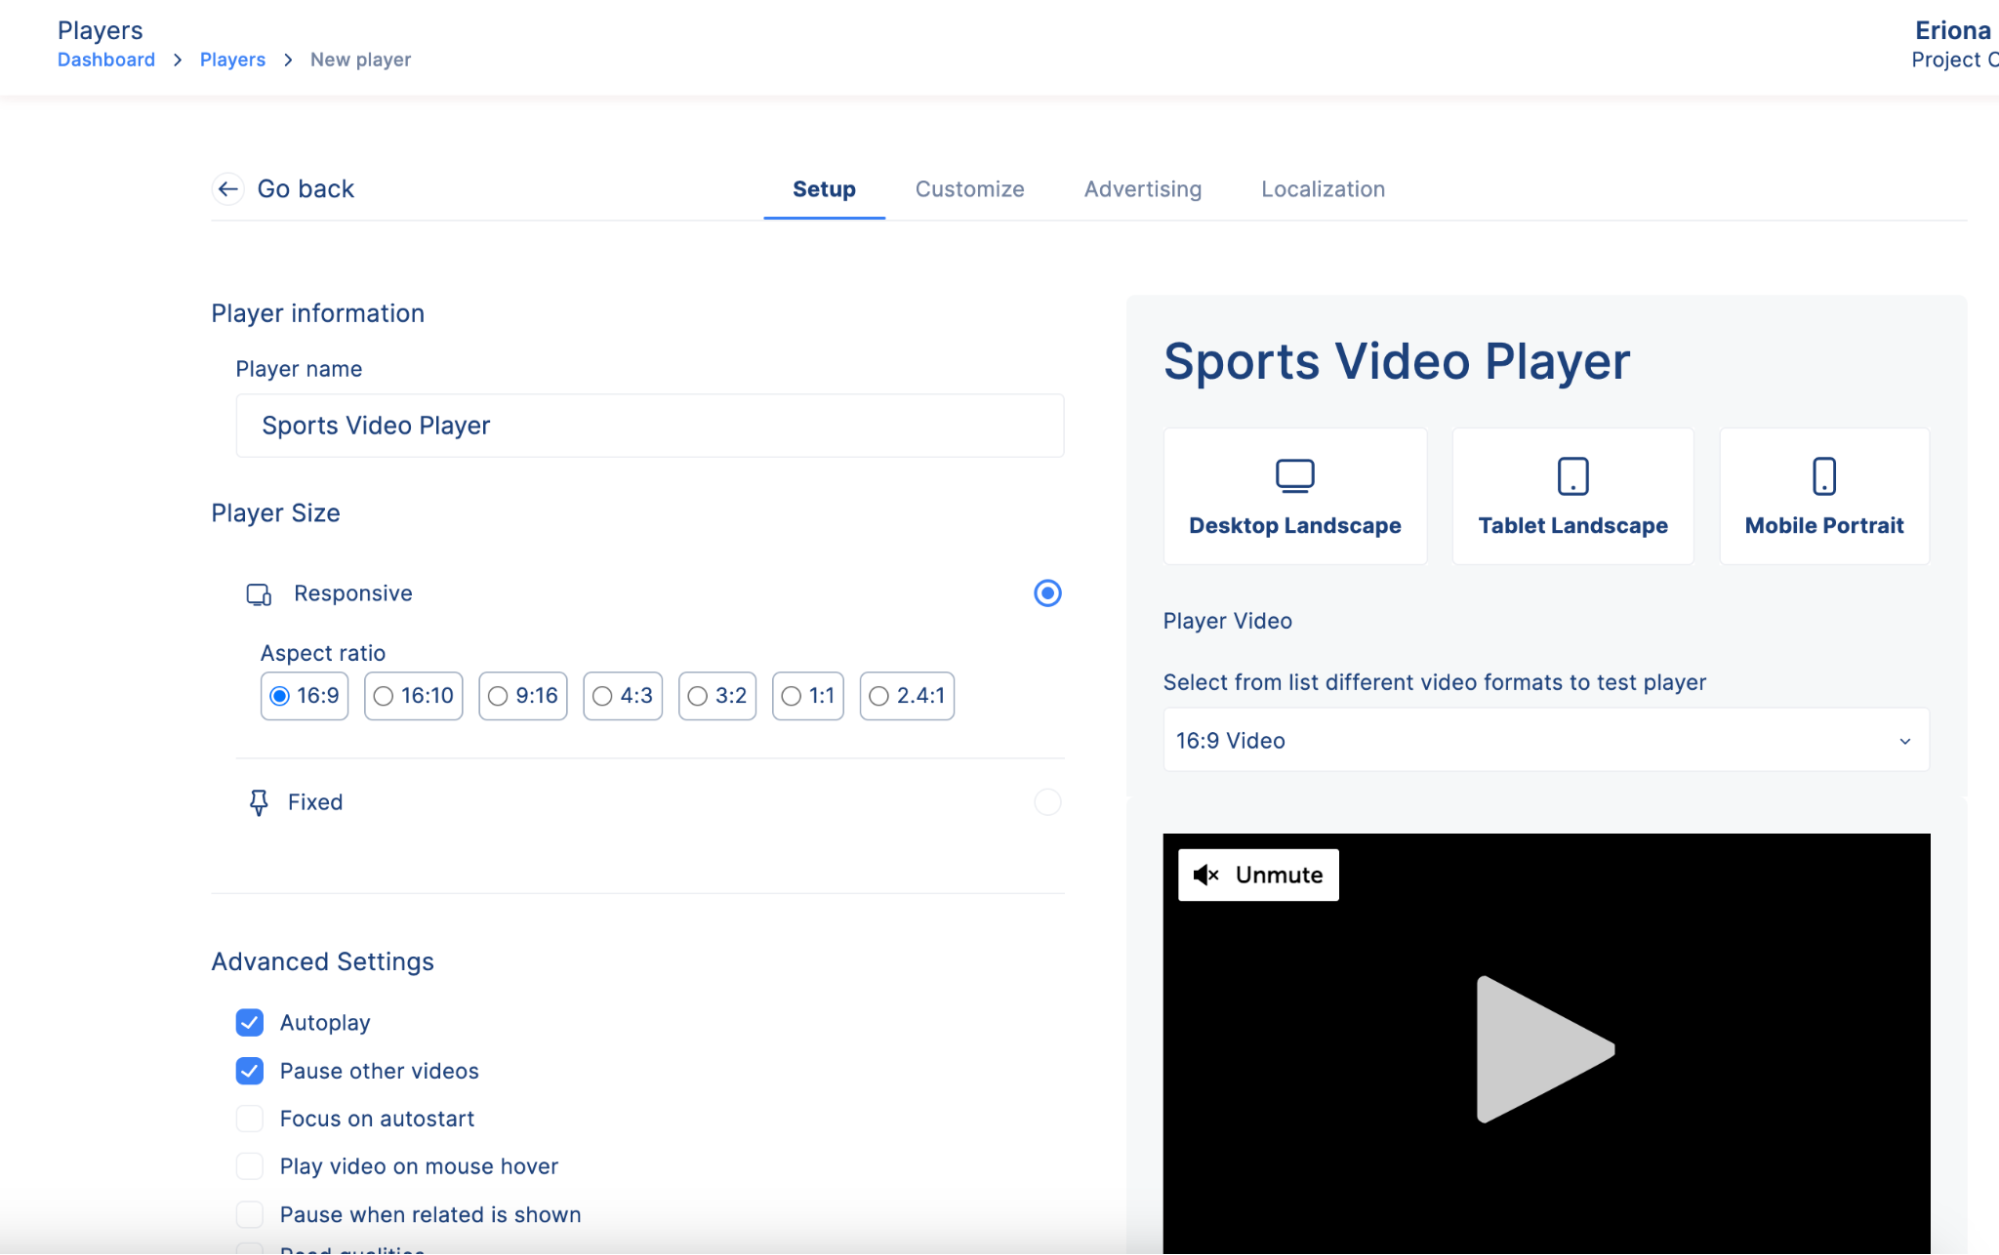
Setup Tab
Click on the Create new player button
You will be redirected to the first page of configuration in a player - Setup Page
Enter the name of the player
Decide whether you want a Responsive size of player or a Fixed one. The match games are usually broadcasted in horizontal formats, that's why for our use case we will continue with Responsive Player, with an aspect ratio of 16:9
NOTE: The user can edit all the settings displayed, for our use case we will cover only some of them
We want this player to play the next video automatically, so we enable Autoplay
This player needs to have all the focus, so we enable Pause other videos feature
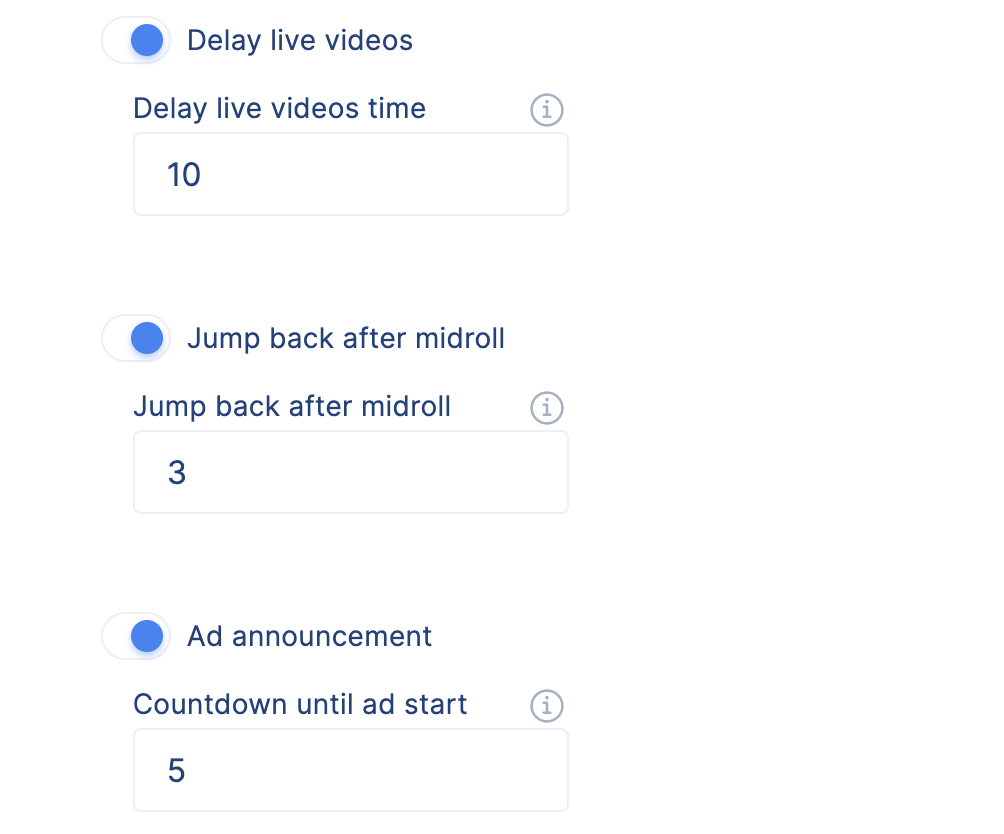
Set a delay of 10 seconds, if this player is used for live videos
Set the Jump back after midroll to 3 seconds, this means after midroll has ended the video will resume playing 3 seconds back from where it actually started
Set Ad Announcement to 5 seconds, this means the viewer will be 5 seconds warning before the ad starts
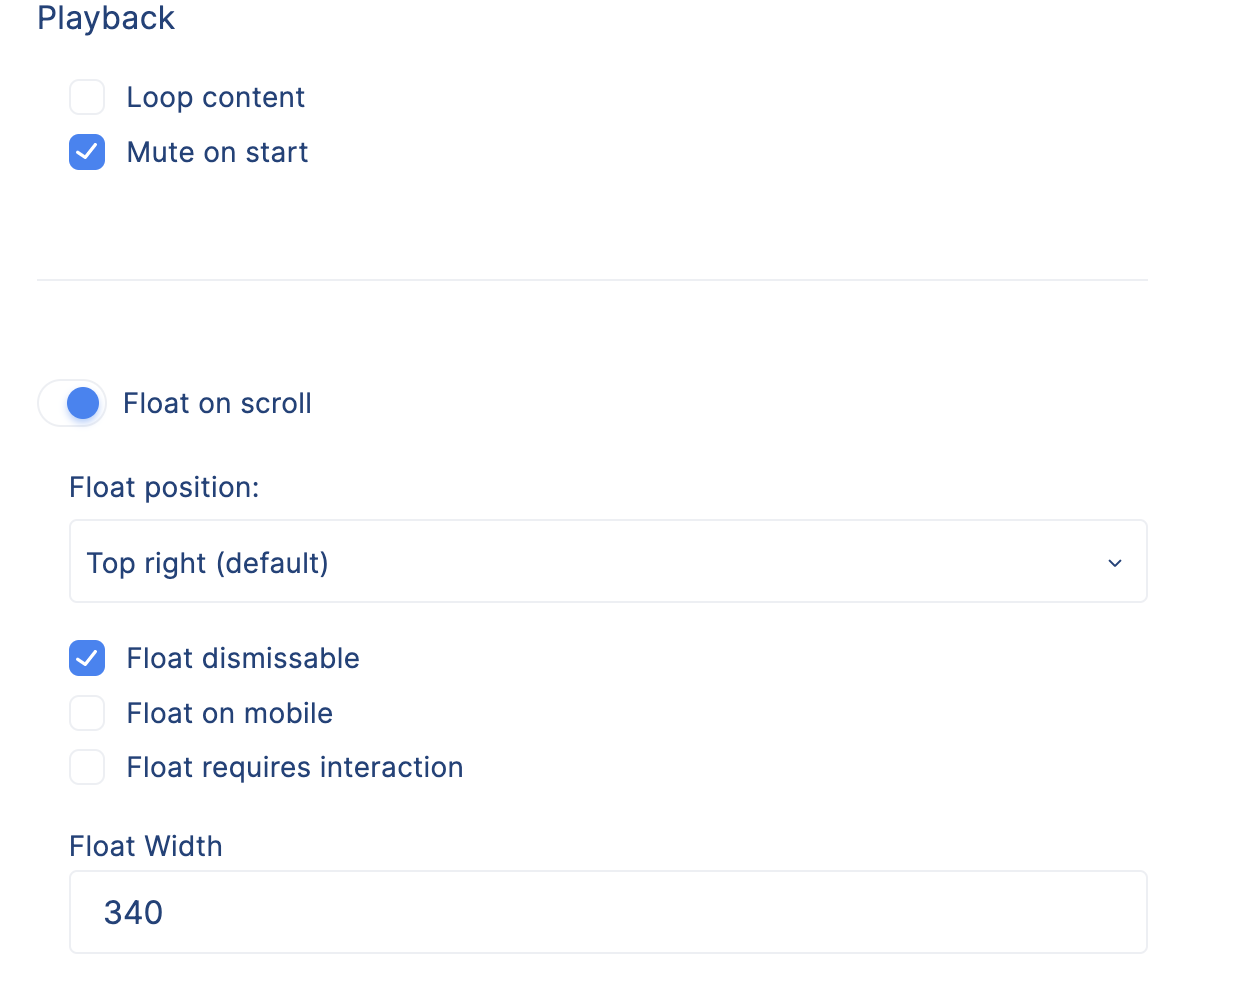
We don't want the user to be stuck in the same video, so we will disable the Loop Content.
Enable Mute on start, the video will start playing on mute setup.
Enable Floating player
Select the float to position to Top right, which is the default
Enable Float dismissable, this allows the user to dismiss floating players.
Enter the width of the player, the integer will represent px.
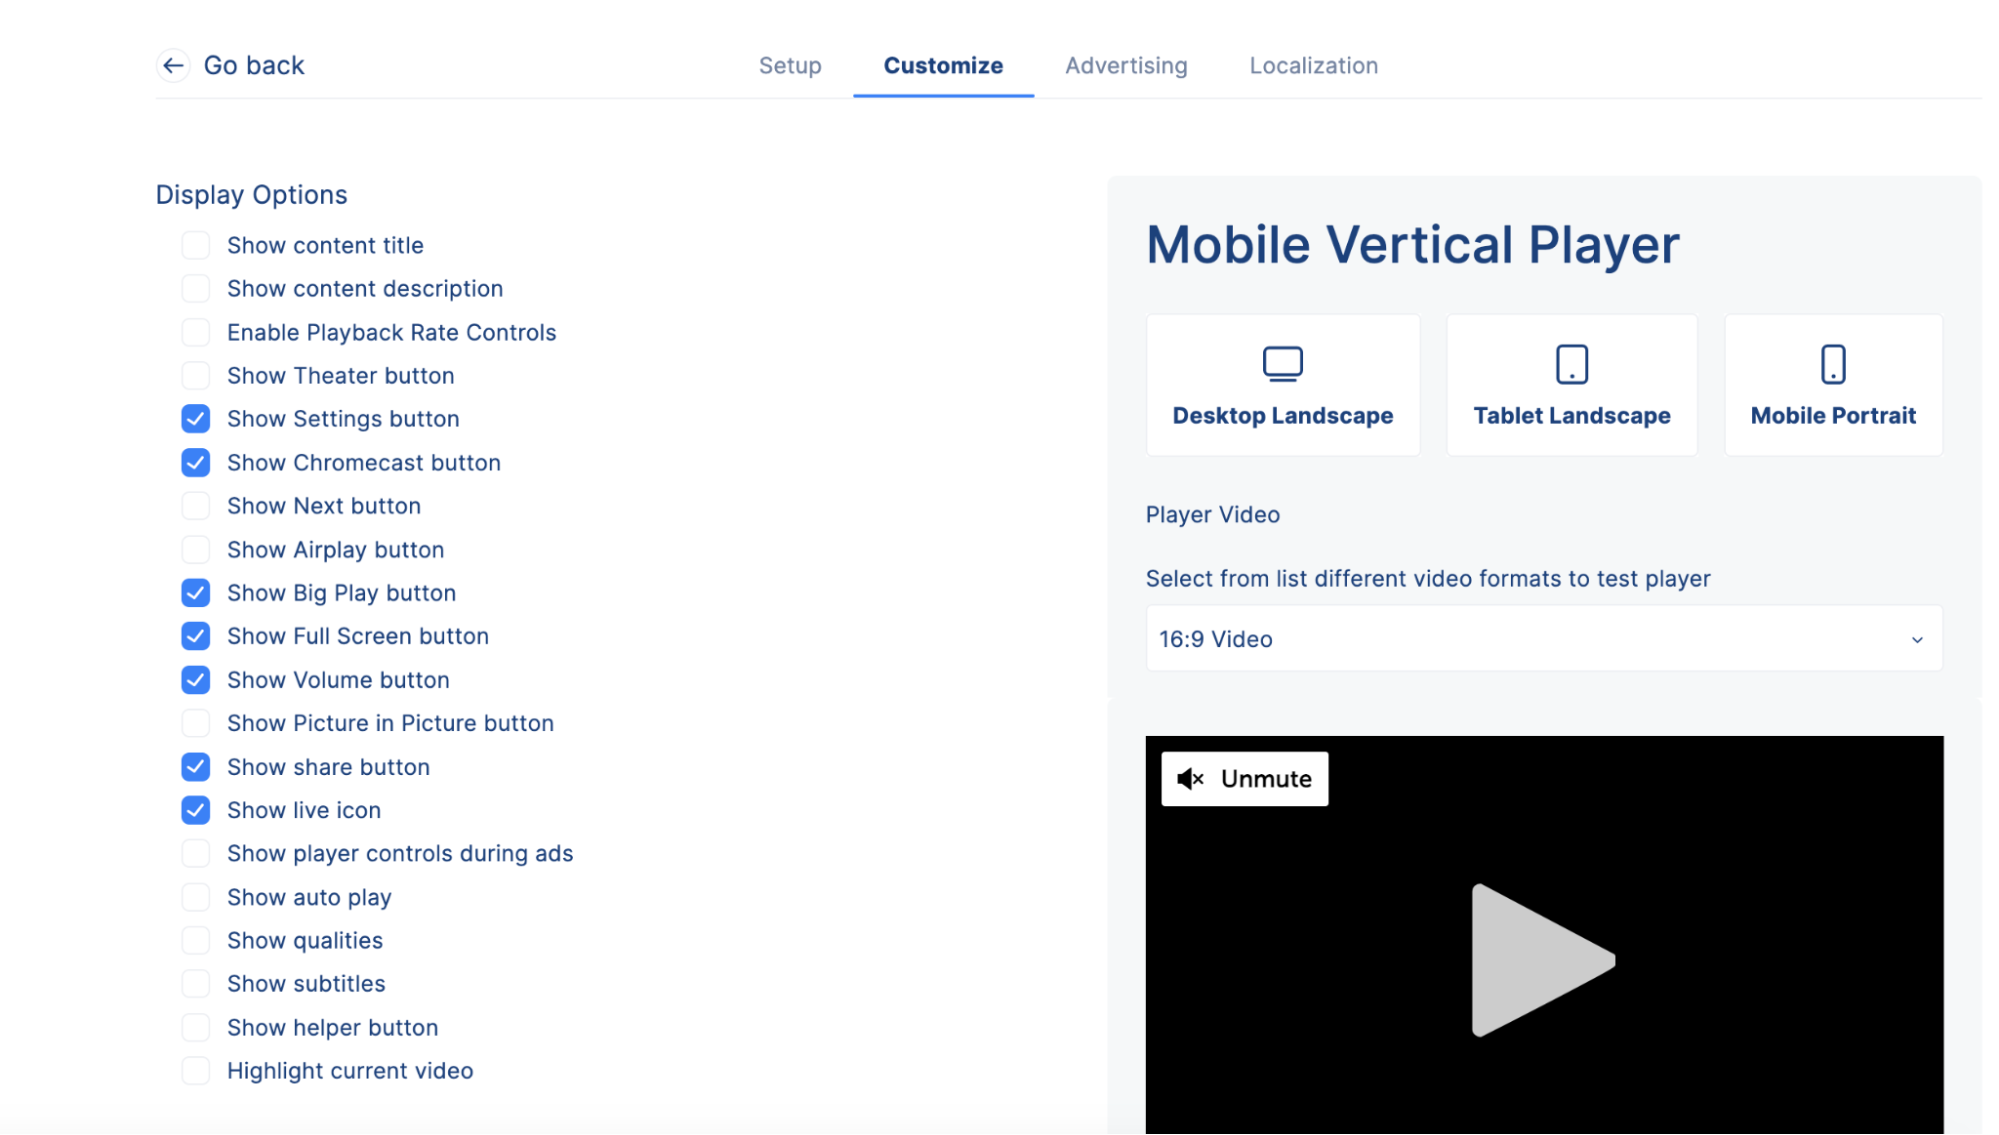
Customization Tab
Enable the Show Settings button, Show Chromecast button, Show Big Play button, Show Full Screen button, Show Volume button, Show share button and Show live icon.
We will leave the Colors section on their default colors, but note that every particle of the player is customizable.
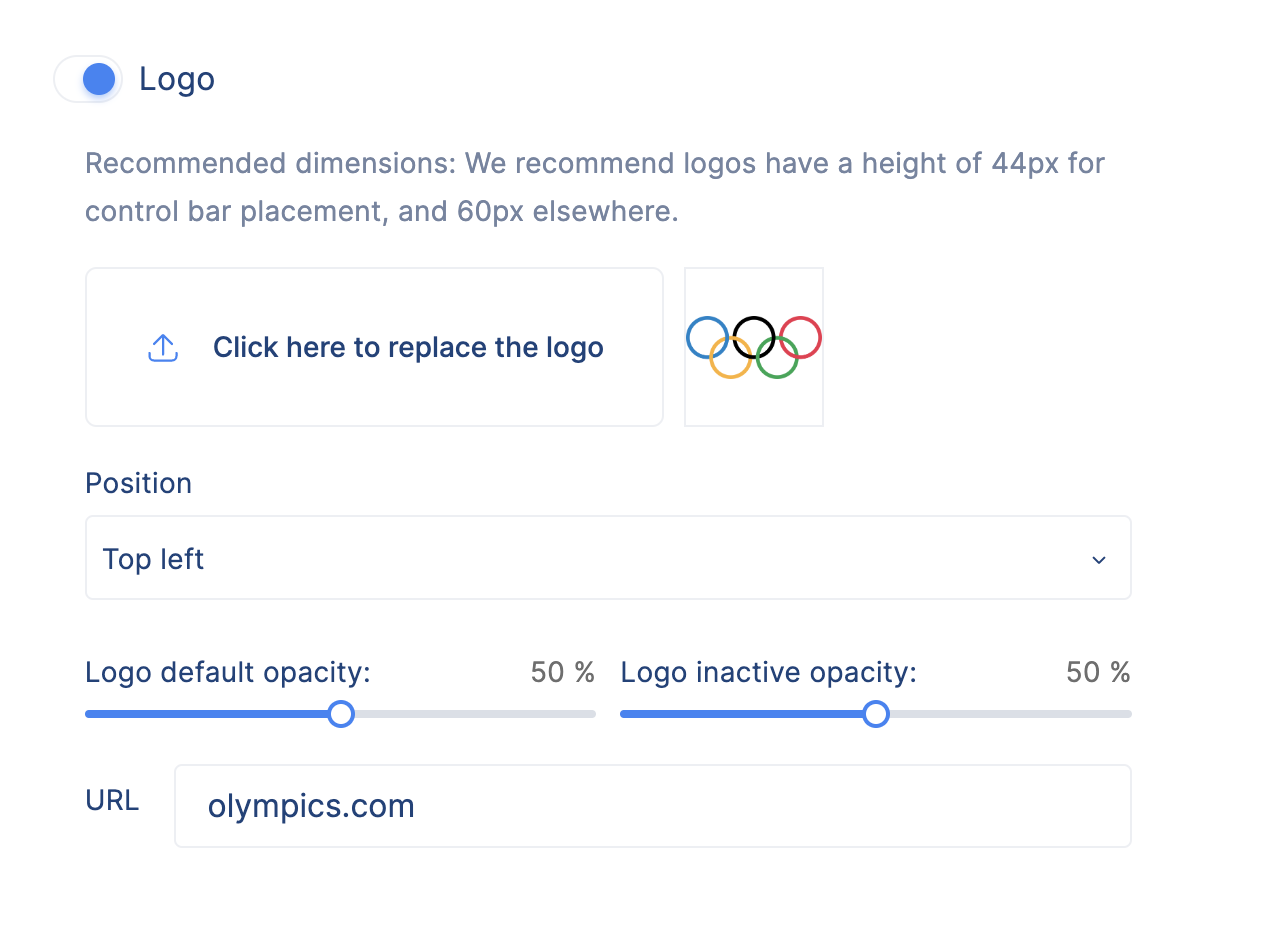
Enable the logo and then upload one.
Set its position and its opacity.
Do not forget to add the link that this logo will redirect you to when clicked.
Advertising Tab
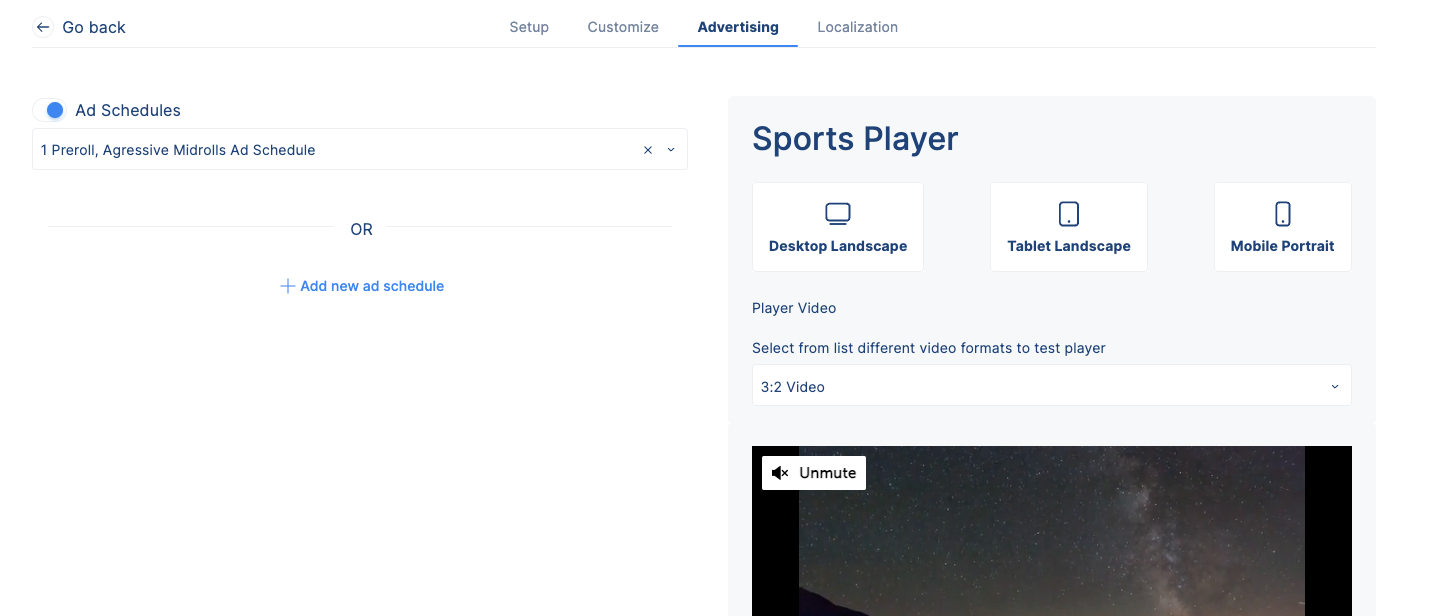
- Enable Ad schedules, and select one for this player.
Localization Tab
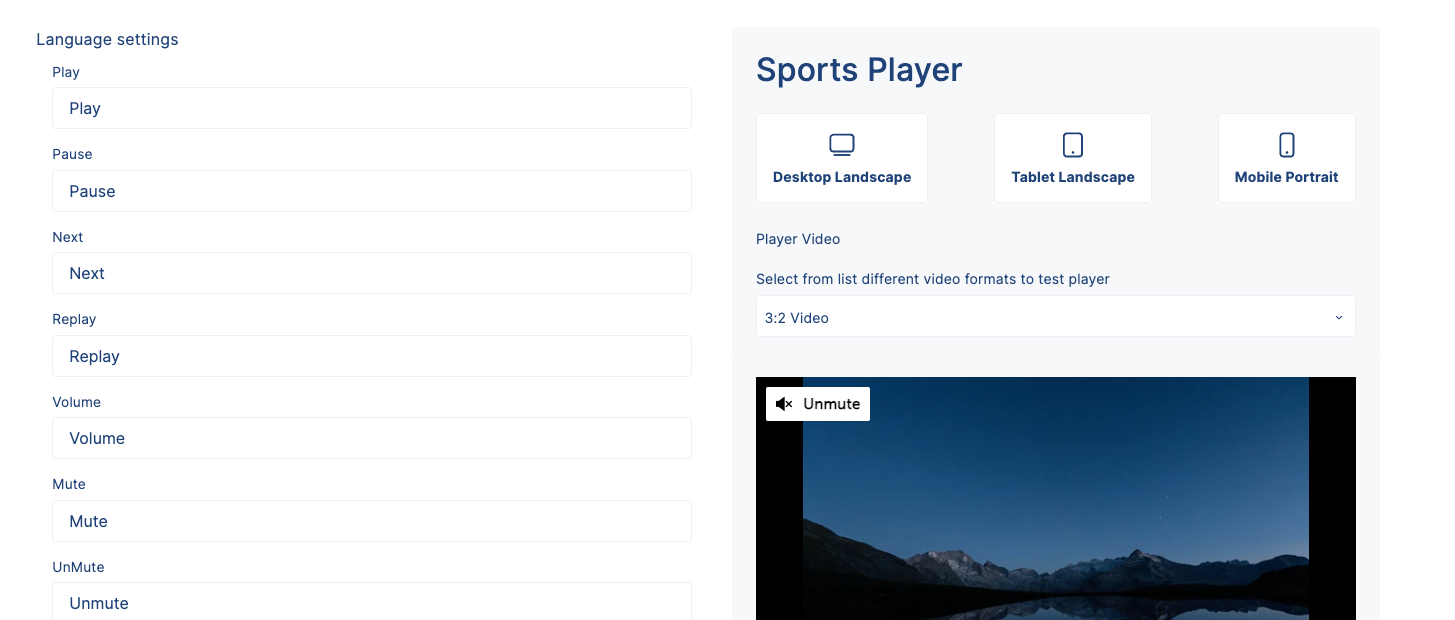
- Add Localization for different buttons, this case we have showed you some localization used in german language
- When you are done with all the configuration click the Create button.
- The player has been created and will be listed in the Players page.